Today we decided to visit Swanage Railway, a heritage line that runs from Swanage all the way to Wareham (although most of the time it stops at a place called Norden).
We parked at Norden (a park-and-ride car park there with access to Norden station).
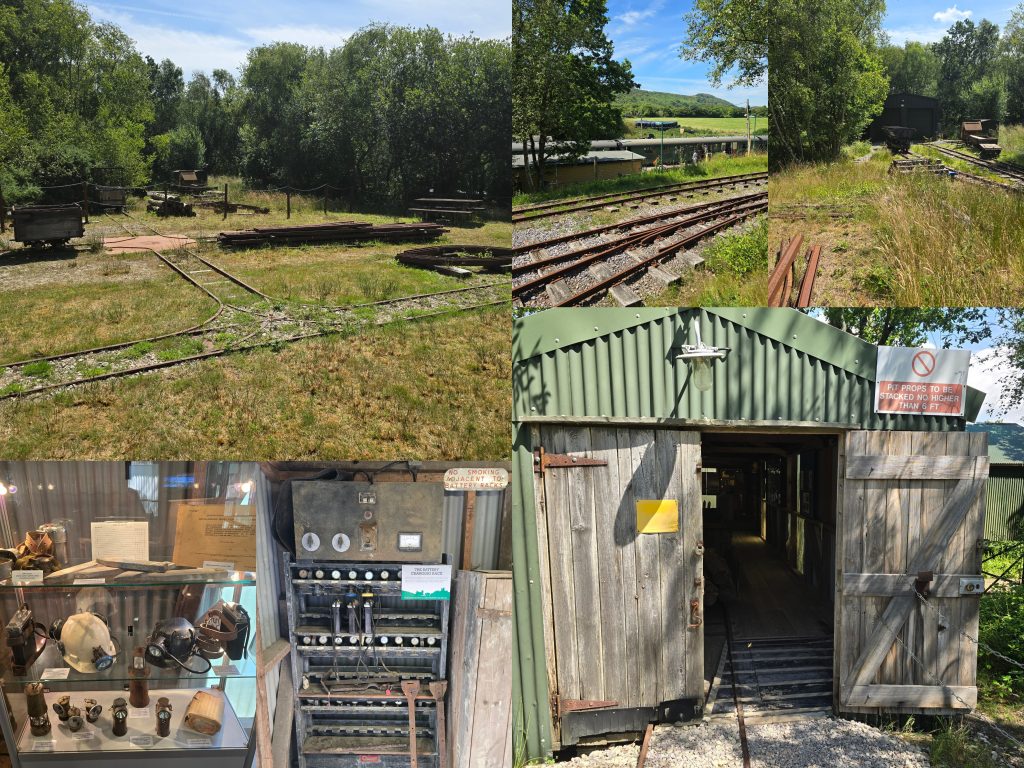
However, before going to the station, we took a small diversion to the Purbeck Mineral and Mining museum…
Clock-wise top left to bottom left:
Mine cart tracks
Narrow-gauge railway tracks (with a heritage railway behind)
Narrow-gauge railway and shed
Entrance to the mine works/museum
Battery charging bank
Mining safety gear
Clock-wise top left to bottom left:
Examples of products made with ball clay from where this mine museum is located
Electrical test equipment
Carts containing logs and a general view of the museum
Another general view, and the entrance to the mine ramp
The mine ramp, leading to a mine tunnel
The mine tunnel
The main mineral mined here was Purbeck Ball Clay, the main concentration of which was here at Norden. Purbeck Ball Clay is sedimentary in origin, and formed from decomposed granite. More info can be found here.
On to the railway…
After visiting the mining museum, we moved on to Norden station to await our train. With time to spare, coffee was the order of the hour…
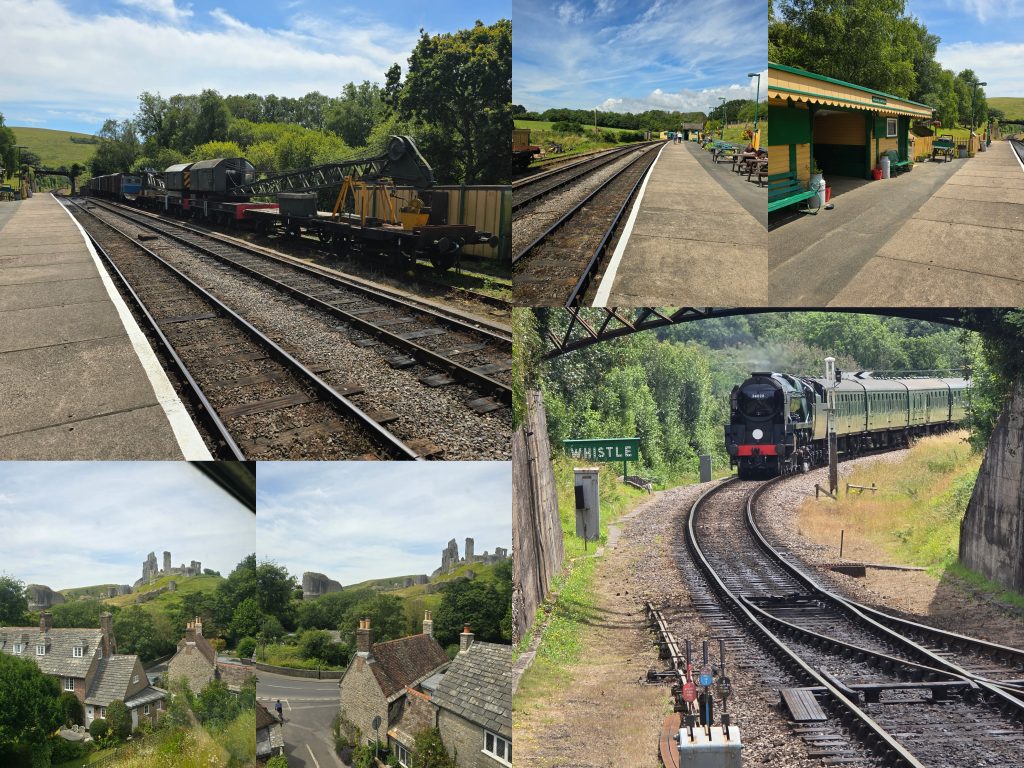
At Norden station. Clock-wise top left to bottom left:
From Norden station platform, some railway cranes
Looking northwards towards Wareham
Waiting area
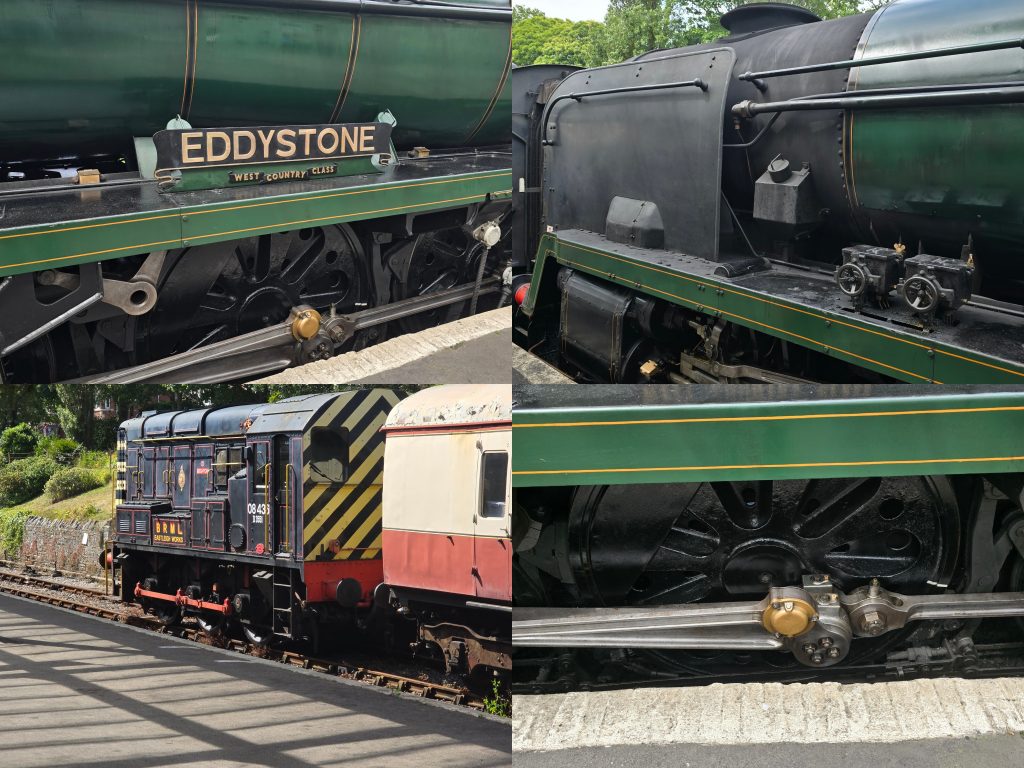
Steam locomotive ‘Eddystone’ coming into Norden with our train
On the train, heading to Corfe Castle
Another view from the train of Corfe Castle
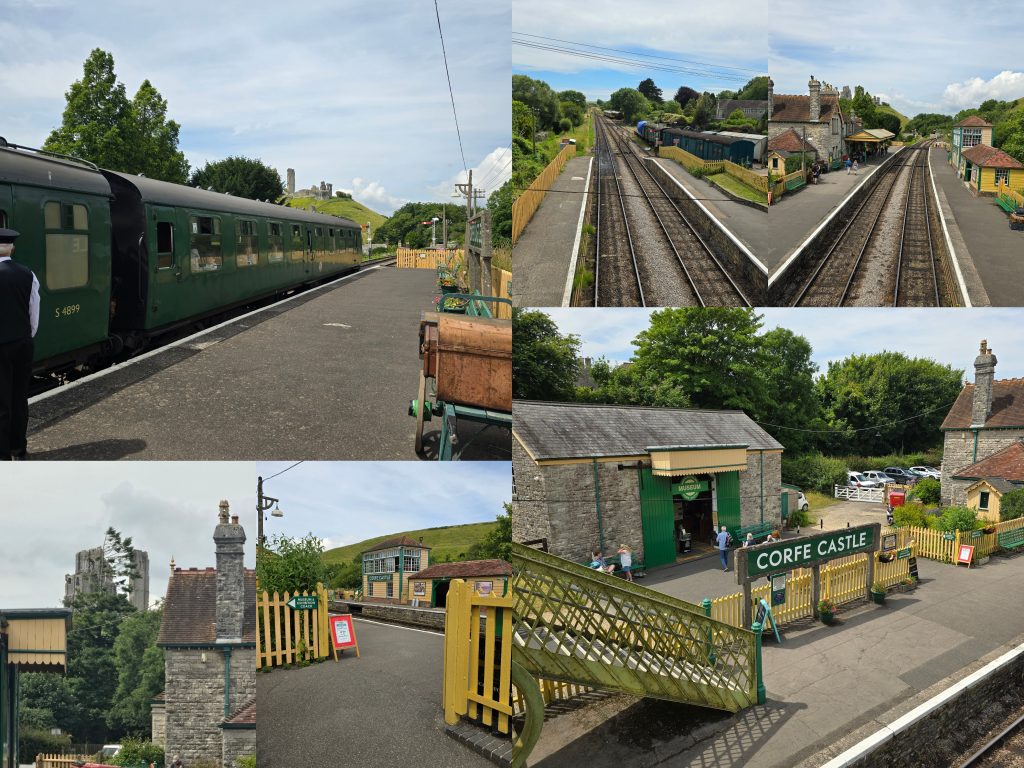
At Corfe Castle station. Clock-wise top left to bottom left:
Off the train at Corfe Castle station
On the footbridge, looking towards Swanage
On the footbridge, looking back towards Norden, the castle in view
On the footbridge, looking towards platform one, and the railway museum
The Corfe Castle station signal box
Corfe Castle looming over the trees
At Swanage station. Clock-wise top left to bottom left:
I have a friend down for a few days, today was the first full day of the visit. Today, we decided to go to the Tank Museum at Bovington. The day started with a big, naughty, full English breakfast at Toby Carvery. And then we were off…
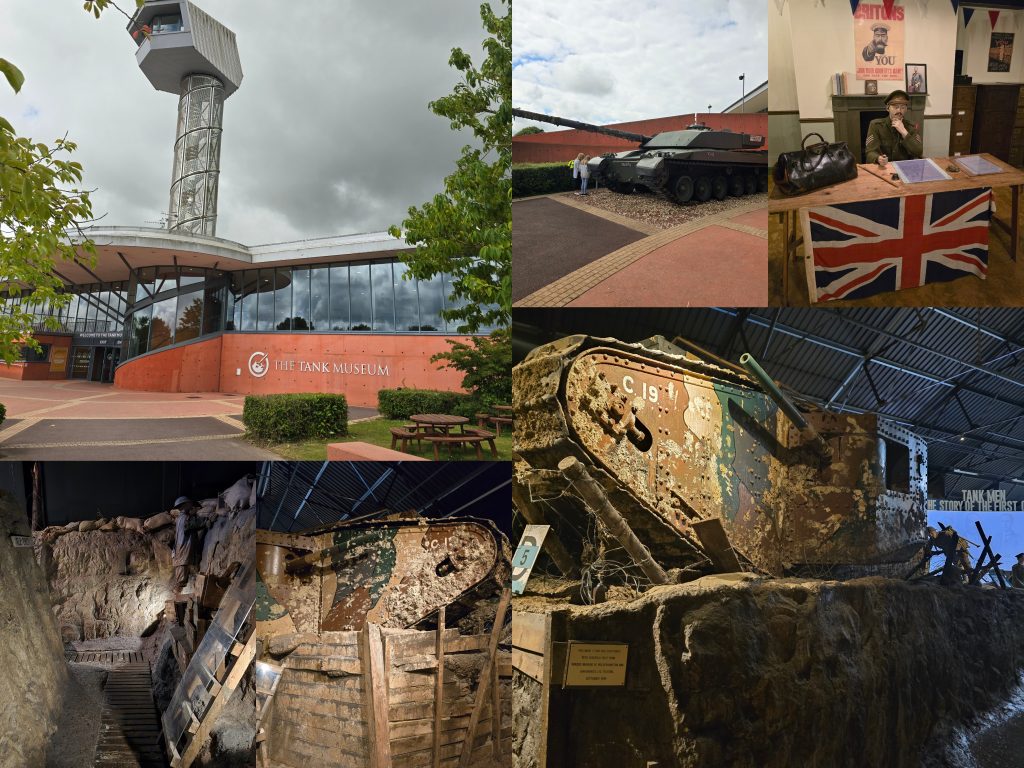
Entrance and on to The Trench Experience (France 1916). Clockwise, top left to bottom left:
The entrance to the museum, with its observation tower
A tank outside the entrance (sorry, I don’t as yet know what it is – there will be lots of images like this with no detail but I will try to gradually fill in that detail)
A mock-up WW1 conscription desk. Will you sign up?
British Mark I tank, the first tank to see “action”. This is the last surviving example of a Mark I (more info here)
Another view of the Mark I
A mock-up of a trench, infamous in WW1
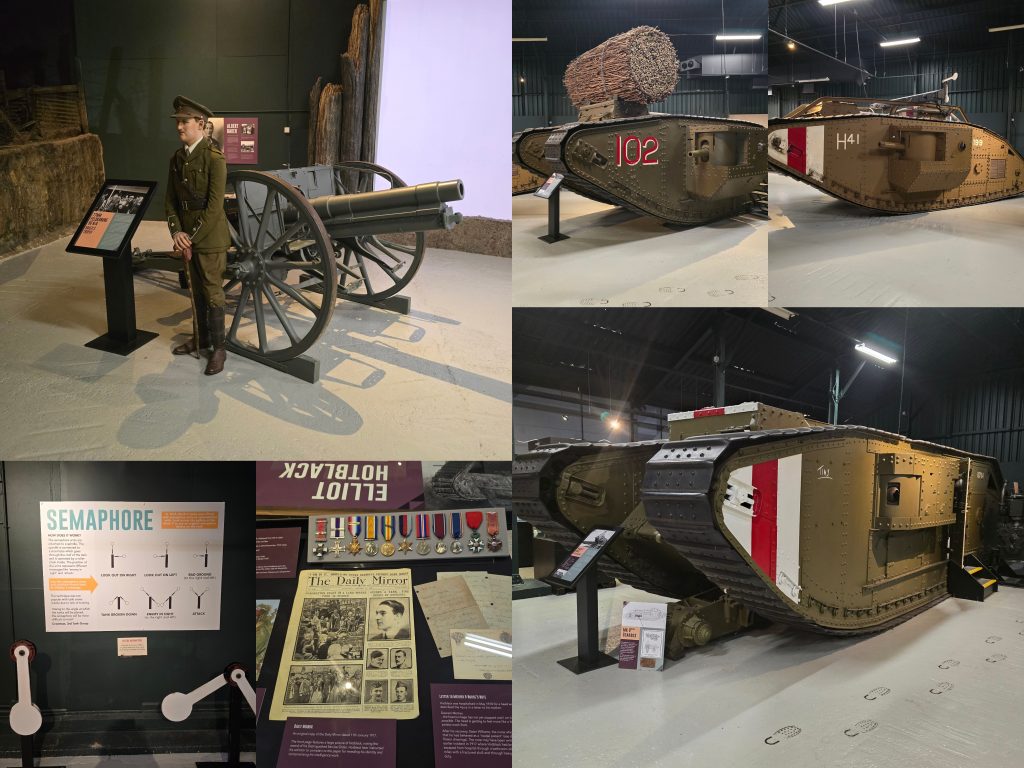
Tank Men (The Story of the First Tank Crews). Clockwise, top left to bottom left:
a 77mm “Feldkanone”, this was a “trophy” taken by Albert Baker
A Mark IV tank, seen here with a large bundle of sticks (‘fascine’) that could be dropped into a trench, allowing the tank to cross…
A Mark V (male) tank
A Mark V (female) tank
A selections of medals, a newspaper (The Daily Mirror, from 1917) and some letters
How tanks communicated with each other in the days before radio
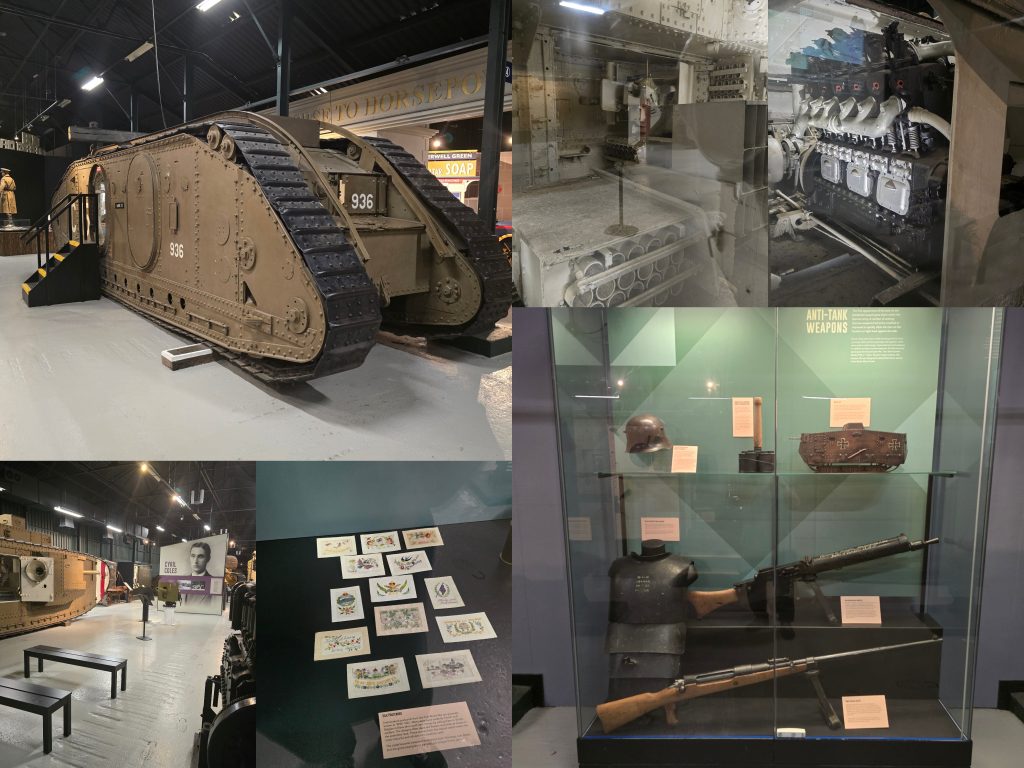
Tank Men (The Story of the First Tank Crews) continuing. Clockwise, top left to bottom left:
Um, a tank…
Inside the tank (general view)
Inside the tank (the engine)
Various weapons and armour used in “tank busting”
Silk postcards
A general view of the “Tank Men” exhibit
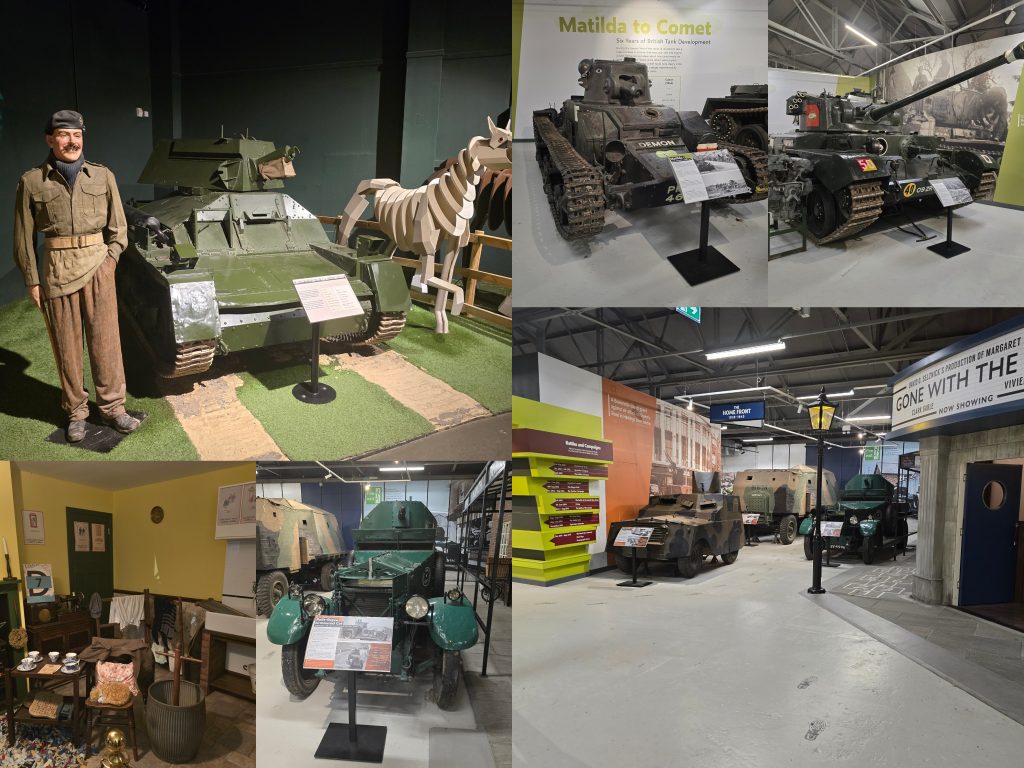
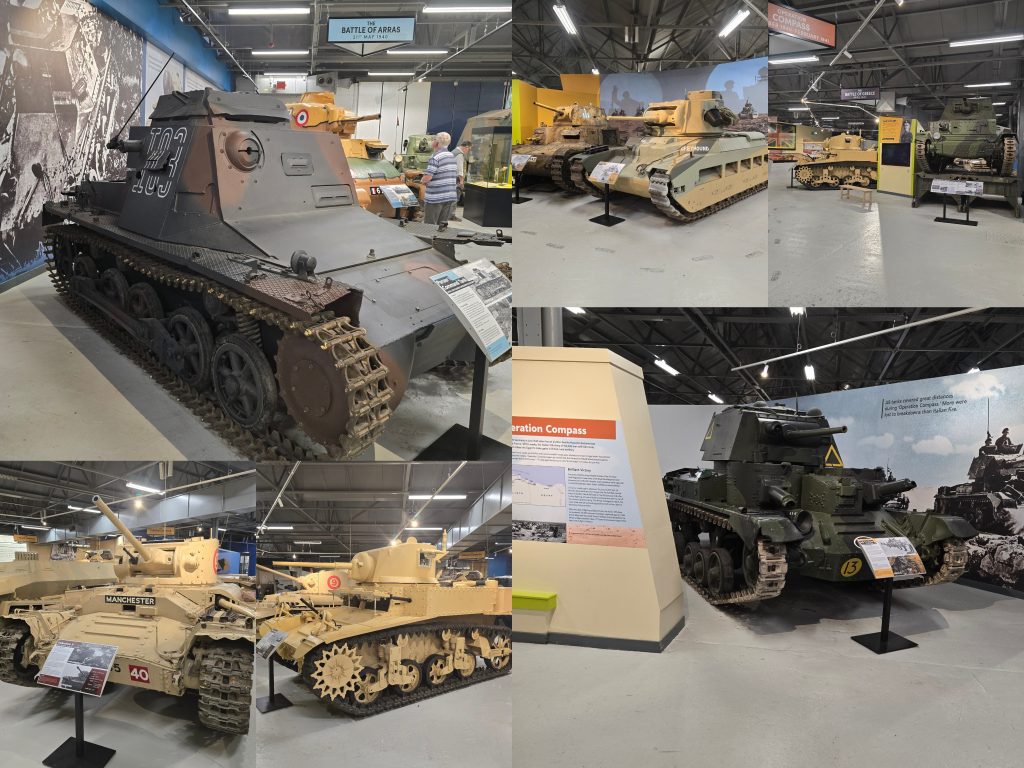
Warhorse to Horsepower (The Rise of the Tank) and on to WW2: War Stories (Royal Armoured Corps 1939-1945). Clockwise, top left to bottom left:
Light tank MK IIA
Matilda I
Comet I
Mock-up cinema and some of the armoured vehicles that might be seen protecting the streets (Babygiraffe, Bison and Rolls Royce Armoured Car)
A better look at the Rolls Royce Armoured Car)
A mock-up of a “living room” at the start of WWII)
WW2: War Stories (Royal Armoured Corps 1939-1945). Clockwise, top left to bottom left:
Ready for tea?
Typical air raid shelter
Inside the air raid shelter looking outwards
Mock-up shop and the back of the Rolls Royce Armoured Car
French Char S35 Somua
Panzer I Command Tank
WW2: War Stories (Royal Armoured Corps 1939-1945) continuing. Clockwise, top left to bottom left:
Panzer I command tank
Matilda II (‘Greyhound’) and M14/41 tank
A10 Cruiser (The Battle for Greece)
A9 Cruiser
M3 Stuart
Valentine II
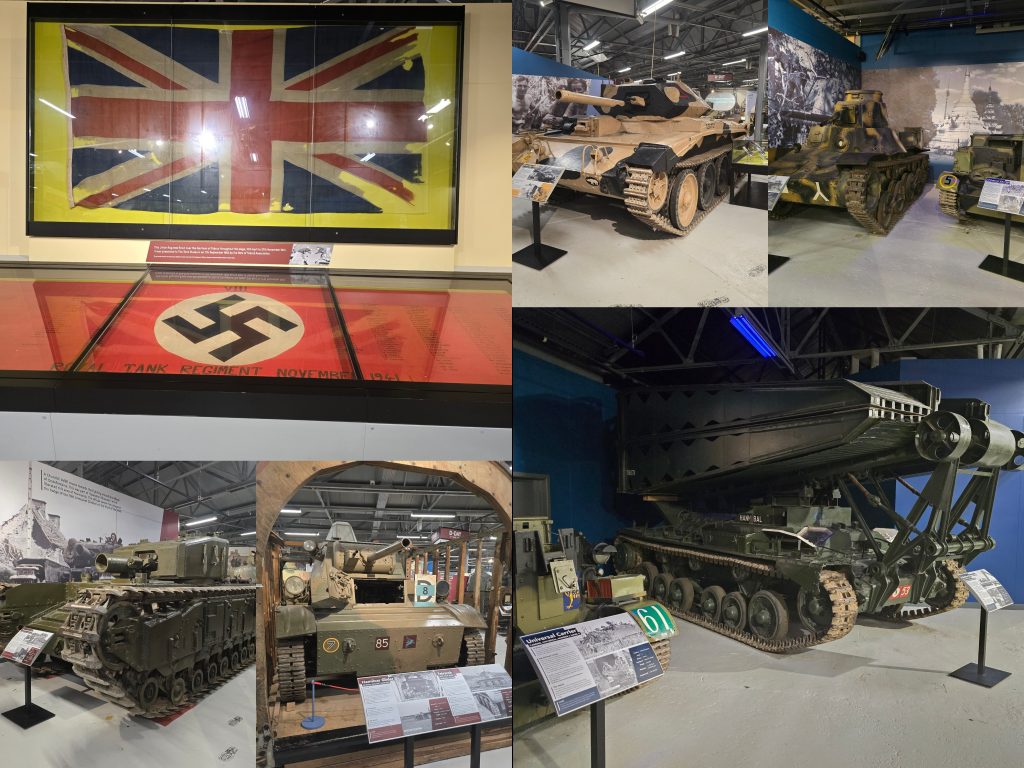
WW2: War Stories (Royal Armoured Corps 1939-1945) continuing. Clockwise, top left to bottom left:
Original Union flag, flown over Tobruk throughout the siege of 10th April to 27th November 1941
Crusader III
Universal Carrier and Ha-Go
Valentine Bridgelayer
Hamilcar glider mock-up with Tetrarch tank
Churchill AVRE
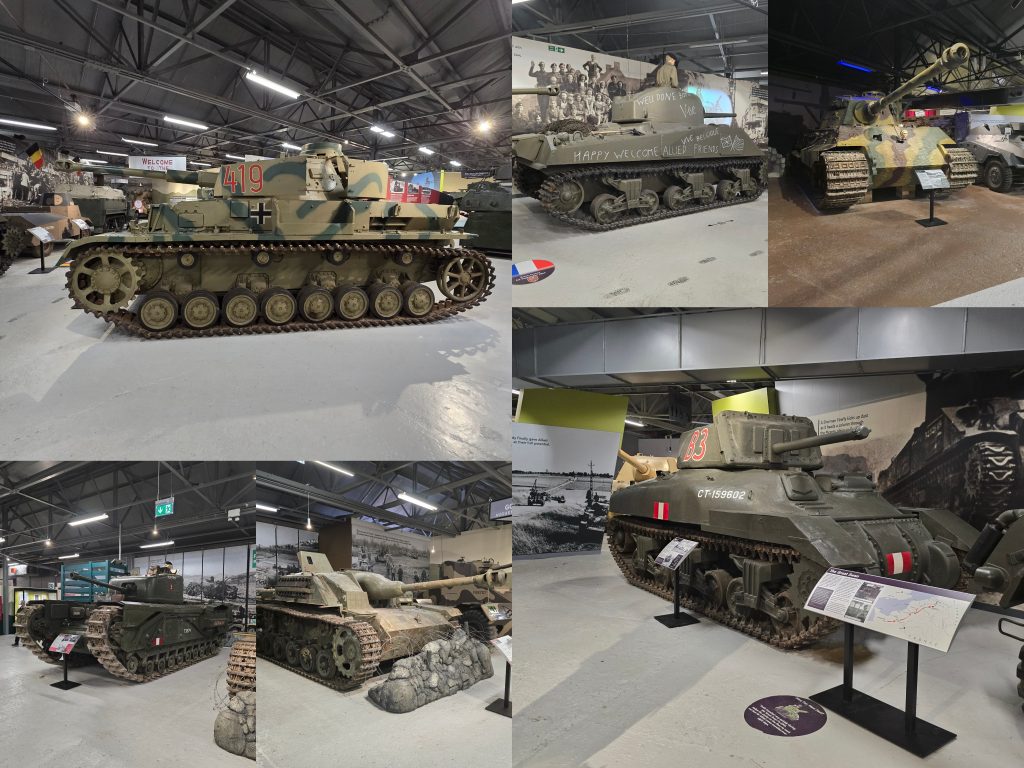
WW2: War Stories (Royal Armoured Corps 1939-1945) continuing. Clockwise, top left to bottom left:
Panzer IV
M4A2 Sherman
Tiger II
Unidentifiable tank
StuG III
Churchill IV
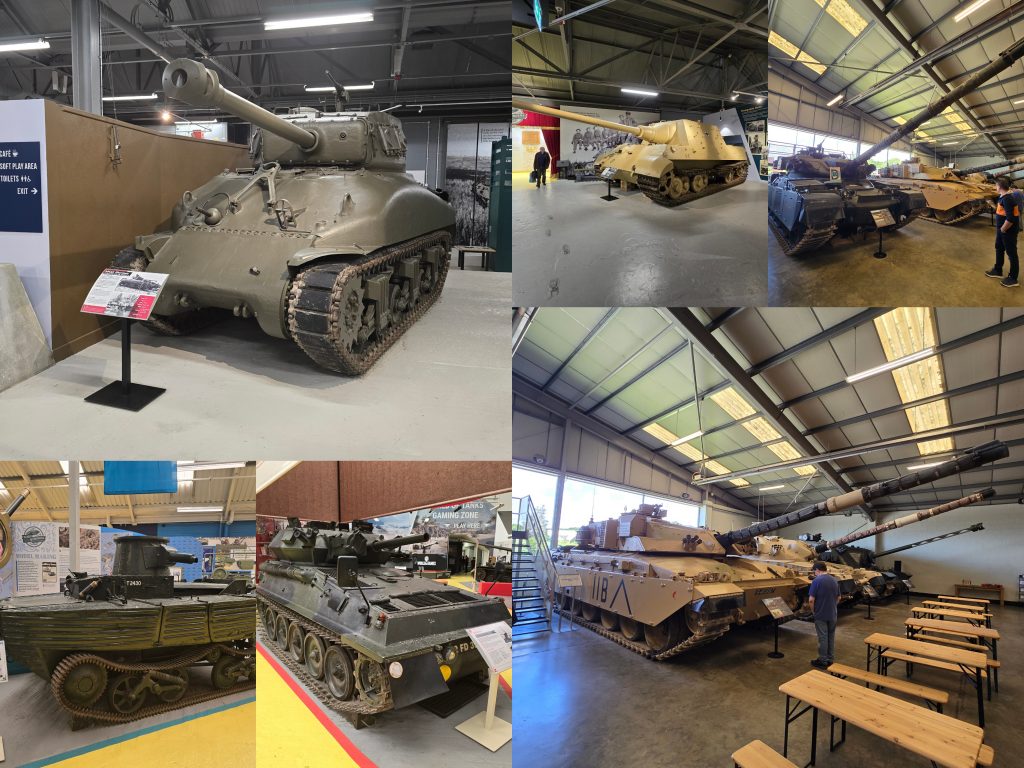
WW2: War Stories (Royal Armoured Corps 1939-1945) continuing. Clockwise, top left to bottom left:
M4A1 Sherman
Jagdtiger
Chieftain
Challenger I
Scorpion
Amphibious tank
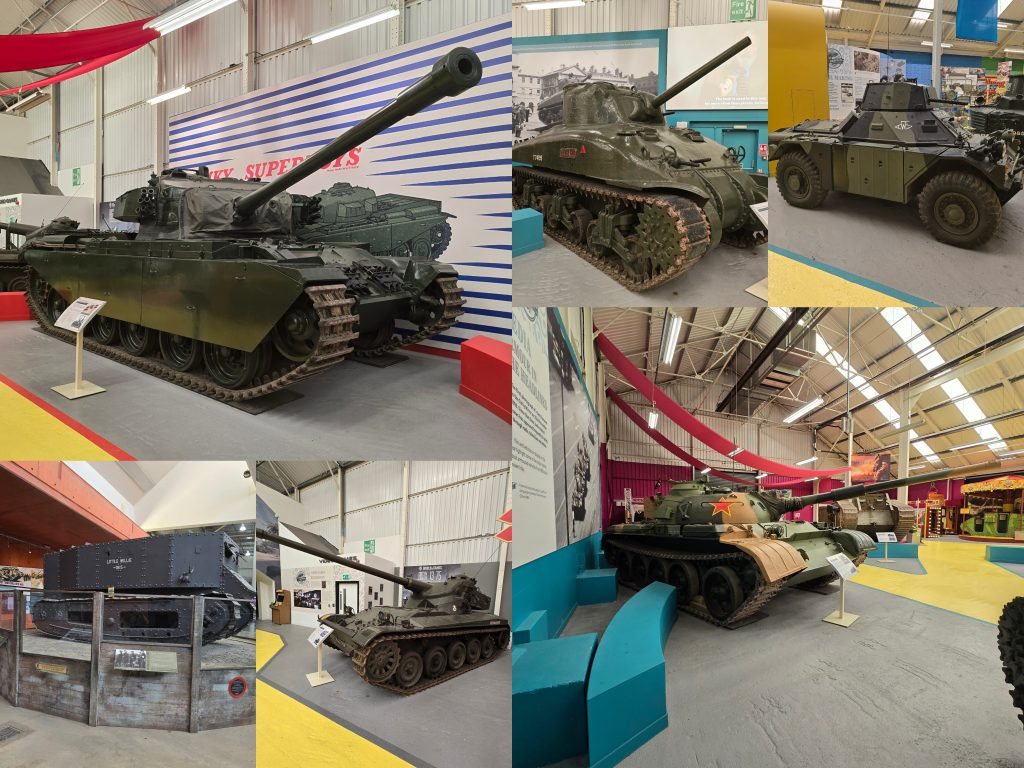
WW2: War Stories (Royal Armoured Corps 1939-1945) continuing. Clockwise, top left to bottom left:
Centurion
Sherman ‘Michael’
Daimler Ferret
Mark II
Panzer 262
Little Willie
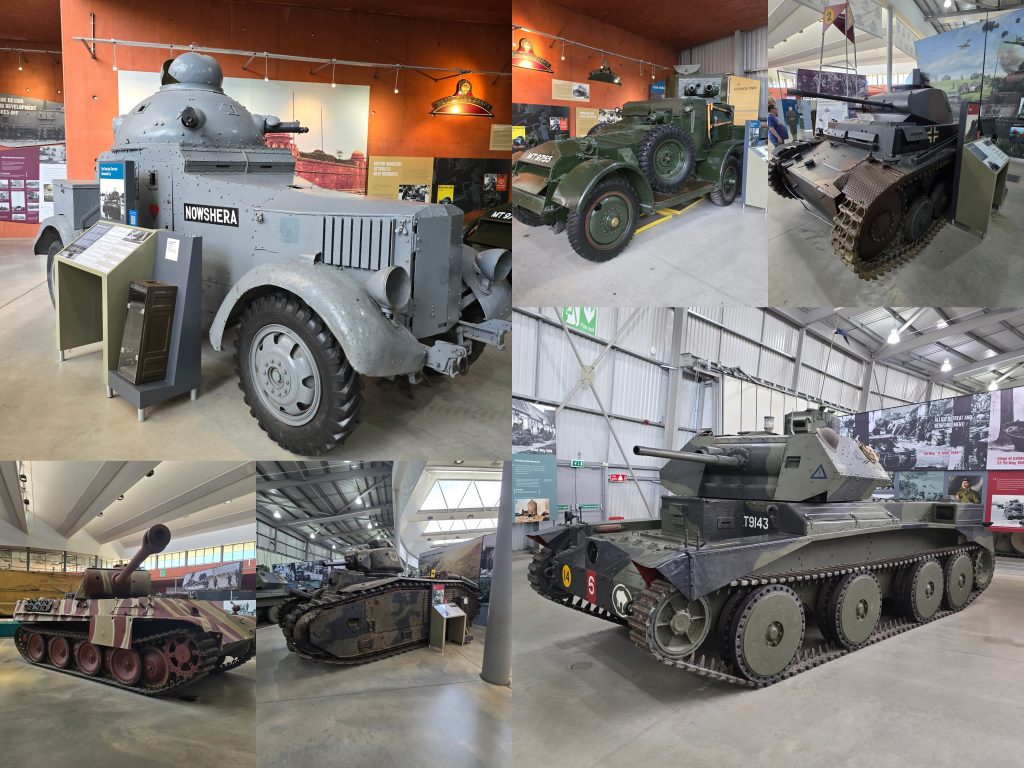
The Tank Story – 1915 to Present Day. Clockwise, top left to bottom left:
Crossley-Chevrolet Armoured Car ‘Nowshera’
Lanchester Mark II Armoured Car
Panzer II
A13 MK I Cruiser
Char B1
Um, a tank
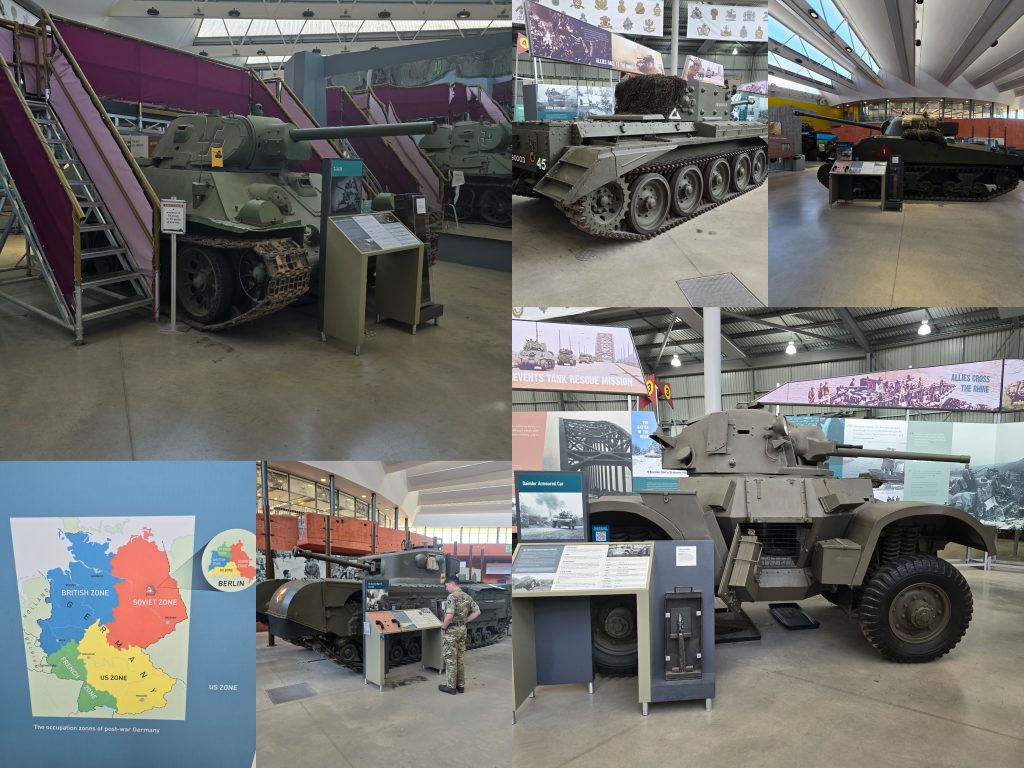
The Tank Story – 1915 to Present Day continuing. Clockwise, top left to bottom left:
T34/76
Um, a tank…
Sherman family
Daimler Armoured Car
Churchill Mark VII Crocodile
A map showing he occupation zones of post-war Germany
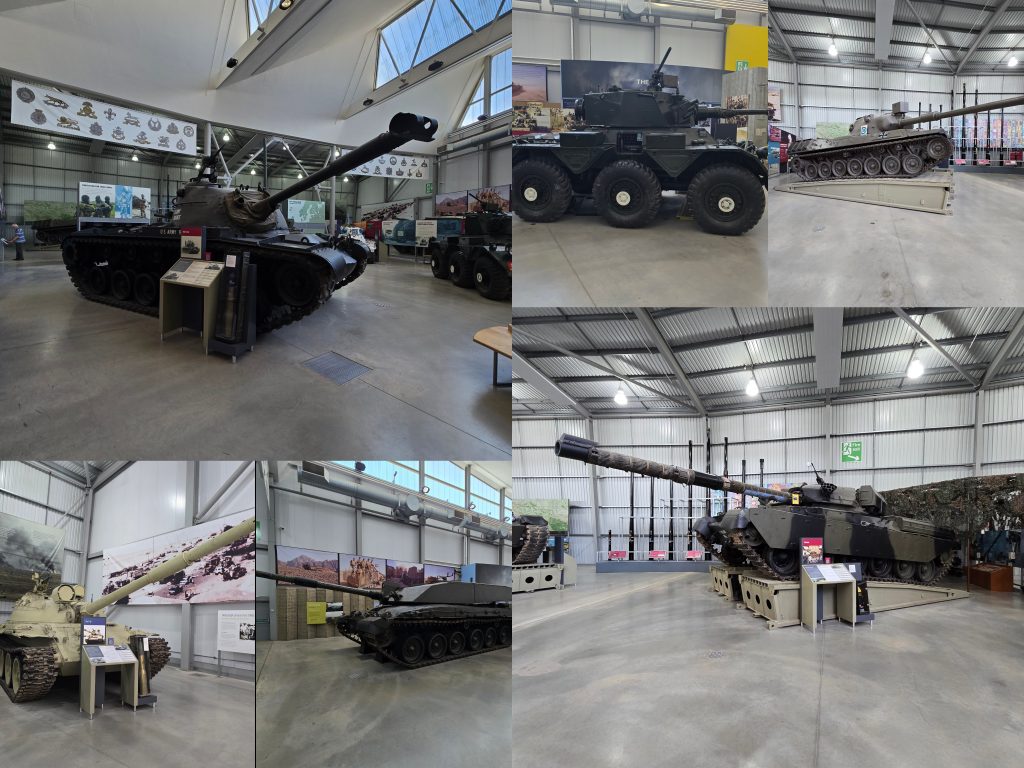
The Tank Story – 1915 to Present Day continuing. Clockwise, top left to bottom left:
M48 Patton
Saladin
Leopard
Chieftan
Um, a tank…
T-62
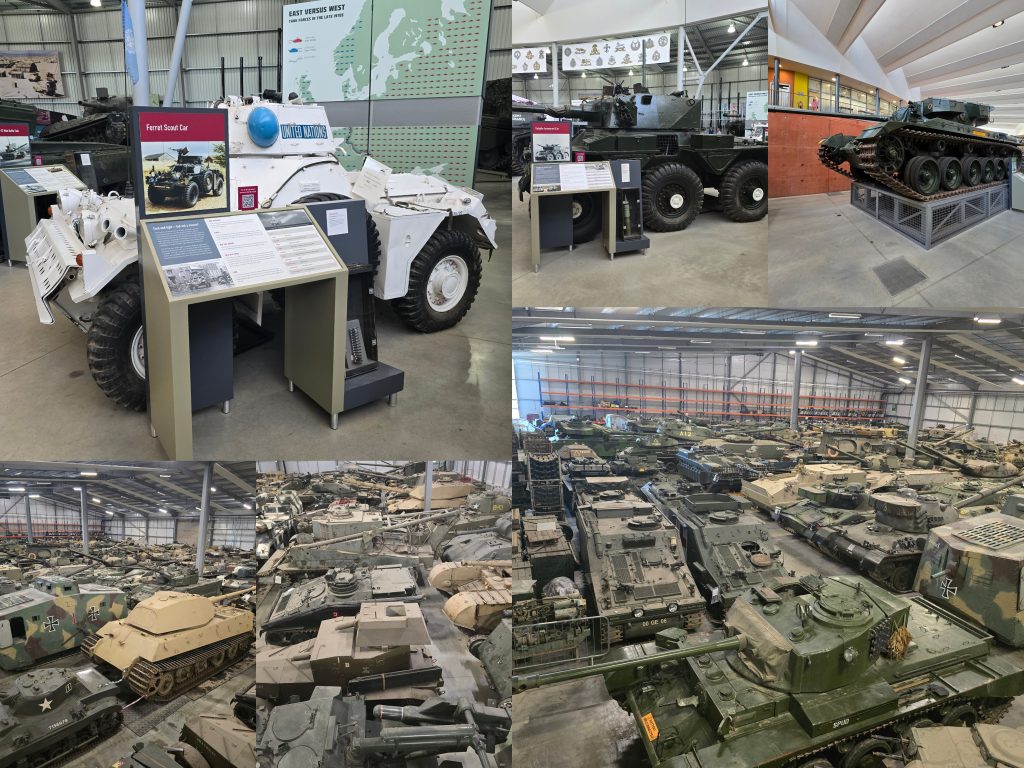
The Tank Story – 1915 to Present Day continuing and the vehicle preservation depot. Clockwise, top left to bottom left:
Ferret Scout Car
Saladin Armoured Car
The Kranvagn
Lots of tanks in the Vehicle Preservation warehouse
Lots more tanks in the Vehicle Preservation warehouse
And even more…
All in all, a very enjoyable visit. My legs were killing me at the end of it (I’m not used to that amount of walking and standing). Whilst I abhor war and violence, I find the war machine fascinating…
I recently moved to Christchurch. This would have been at the beginning of 2022. It’s a long story how I came to move here. But, in the first two years, I didn’t do much exploring, various reasons, mostly to do with health. But since my recent hospital stay (you can read more about that here ), I have a renewed interest in life…
So in recent weeks, I’ve done a bit of exploring. Not on my own, with my sister, my eldest niece and my sister’s partner, all on different days. What follows are some pictures I took, and a little detail accompanying each.
Part 1 – 2nd June 2024
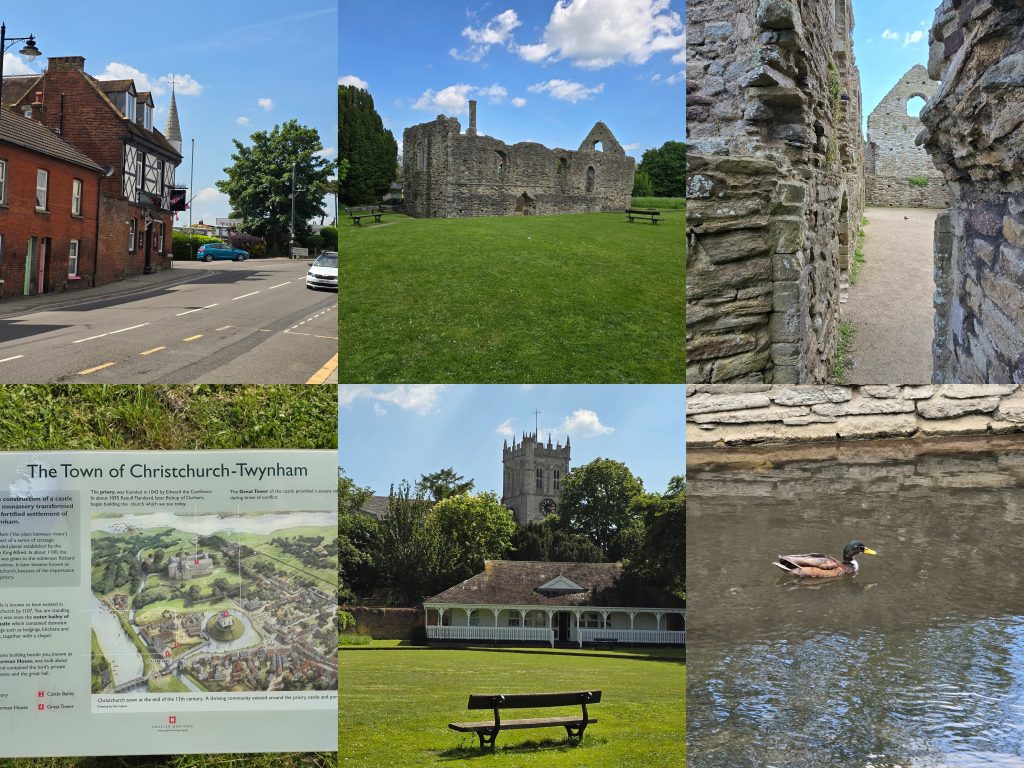
This was my first excursion, with my sister. Clockwise from top left to bottom left:
Waiting for a bus to the main part of Christchurch. This is my local pub, the Railway
After getting off the bus, at Priory Corner. This is the ruins of the Norman House
A view inside the ruins of the Norman House
A mallard having a a lovely swim in the side stream next to the Norman House.
A view across the bowling green towards Christchurch Priory
A sign showing the Norman House and other bits of interest in the area
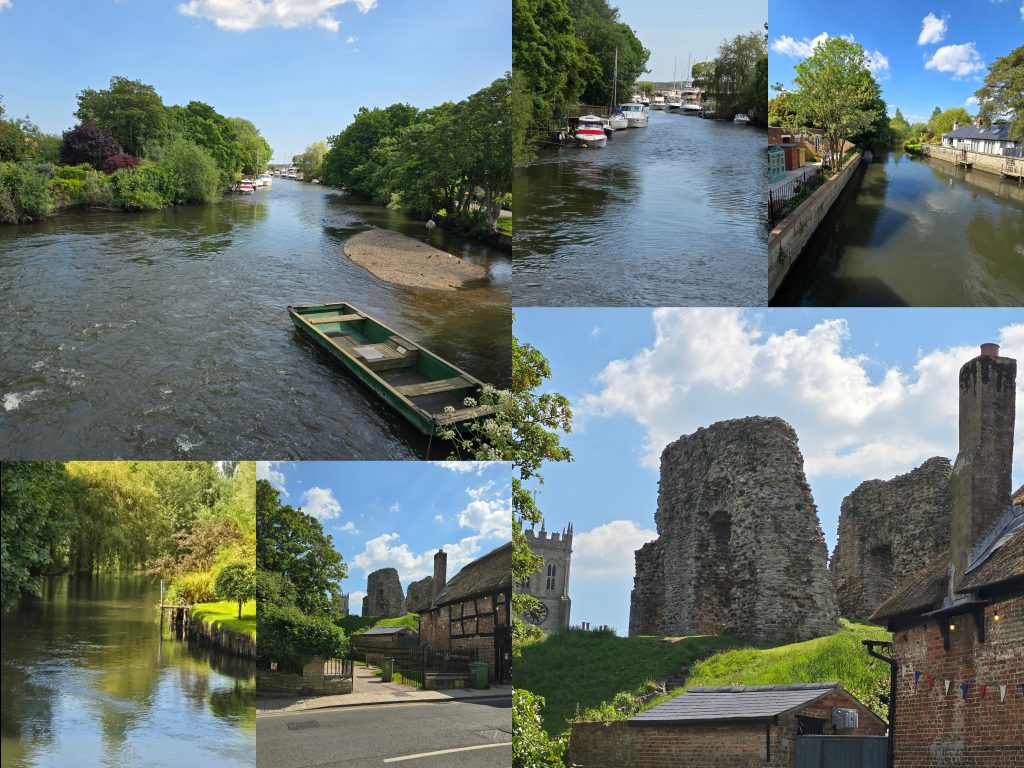
Continuing on from that same day, again clockwise from top left to top right, then bottom left to bottom right:
Down the main river Avon, with a flat-bottomed punt, used for fishing
Same view, but more zoom
A view up the side stream (across the bridge from the Norman House in previous images
Same view, but more zoom
A view towards the ruins of the Great Tower (you can see this in the sign in previous images)
A more zoomed in view of the Great Tower
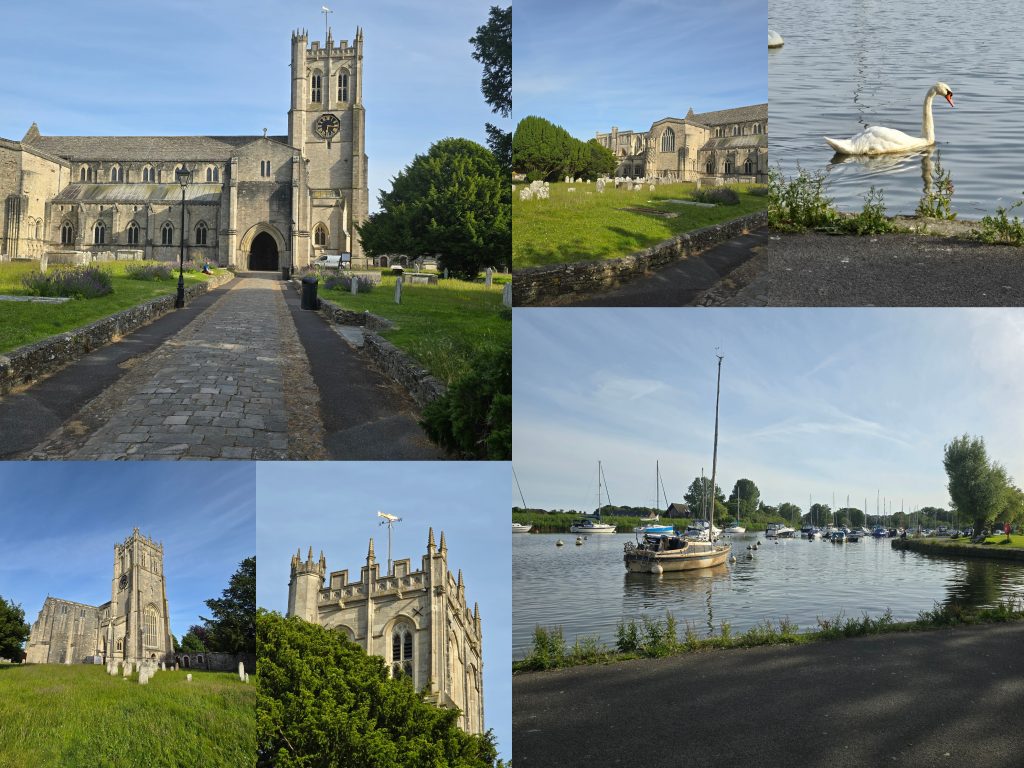
Part 2 – 17th June 2024
My second excursion, this time with my sister and eldest niece. We went a bit further this time. from top left to top right, then bottom left to bottom right:
Christchurch Priory
Another view of the Priory
Hmm, slightly out of order, this was a swan swimming on the river Stour, south of the Priory
Another view of the Proiry
A zoomed view of the Prior tower. showing the weather vane – a fish!
A general view of the river Stour, south of the Priory, with lots of boats
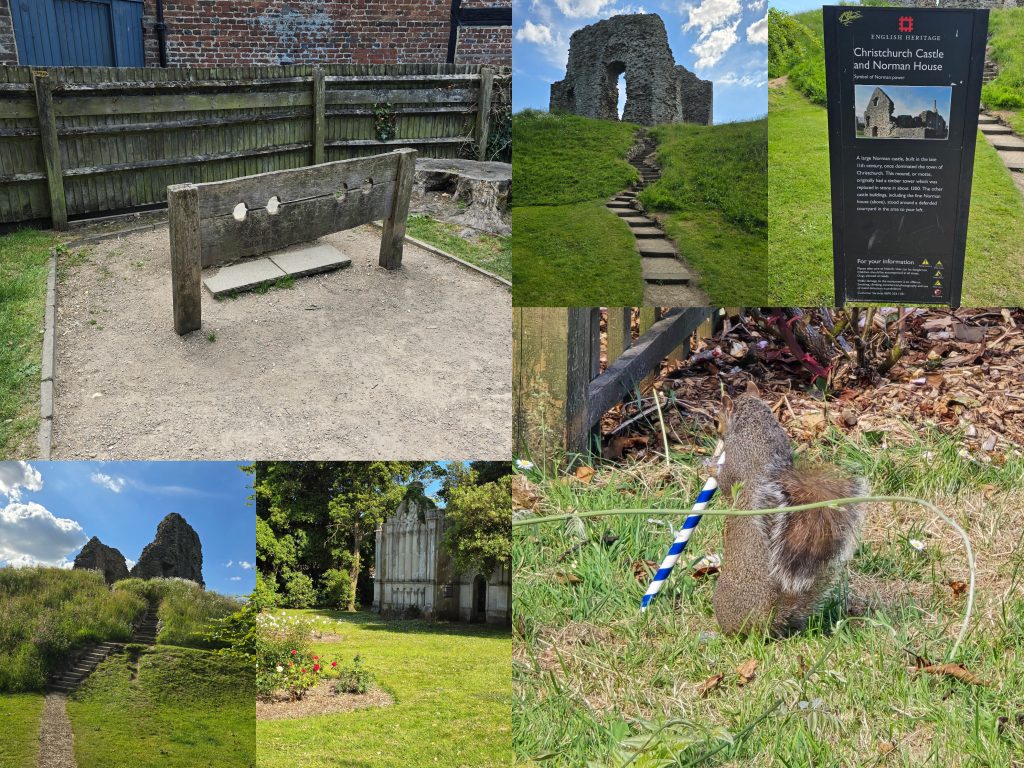
Part 3 – 19th June 2024
My third excursion, this time with my sister’s partner. Clockwise top left to bottom left:
Stocks
The ruins of the Great Tower
A sign, giving some detail of the Norman House from previous images, and the castle (of which the Great Tower is part of)
A squirrel enjoying a paper straw it stole from a rubbish bin
Not sure what this is.
Another view of the Great Tower
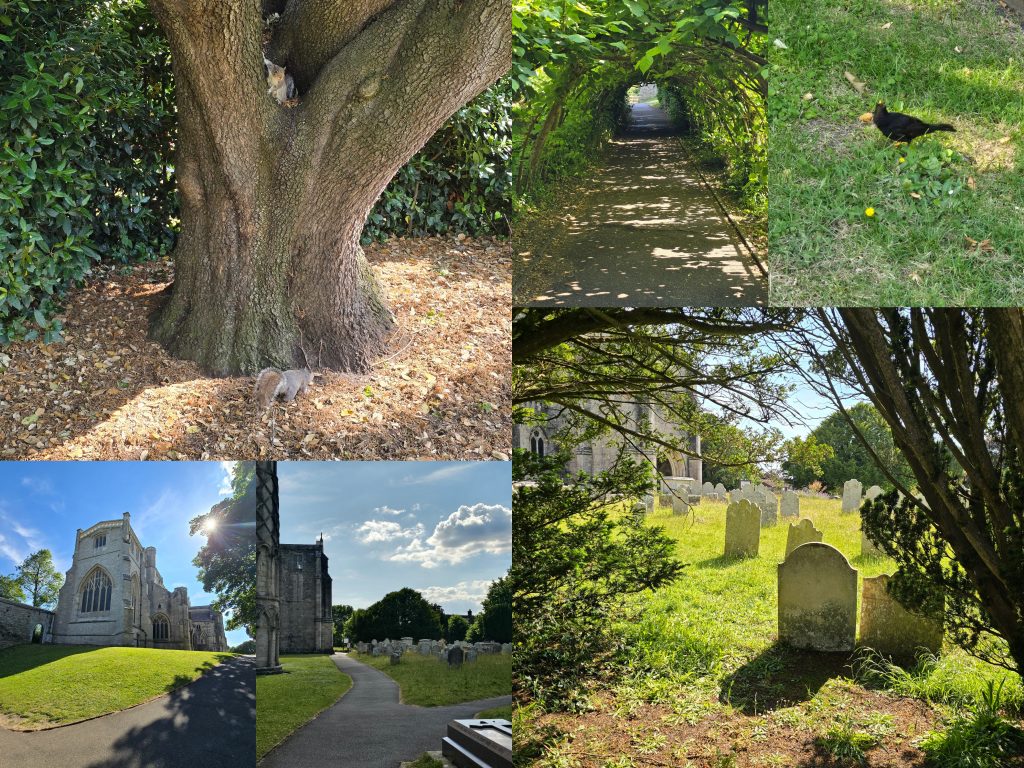
Continuing on from that same day. From top left to top right, then bottom left to bottom right:
A tree with lots of squirrels
A leafy tunnel leading to the Priory
A friendly blackbird
A view of the Priory
Another view of the Priory with its graveyard
A view through the trees with the Prior graveyard (and the Priory just visible too)
I hope you enjoy these pictures. I will add more about Christchurch as I get out and about there.
Since I will be adding more content soon, so as not to lose this retrospective, herein lies all the historical posts of that not so good time in my life. So, in recommended order of reading: